docker下,极速搭建spark集群(含hdfs集群)
docker-compose 部署搭建好的spark和hdfs集群
1 | wget https://raw.githubusercontent.com/Bert-Z/Spark-GraphX/master/docker-compose.yml \ |
查看环境
接下来检查一下整个环境是否正常
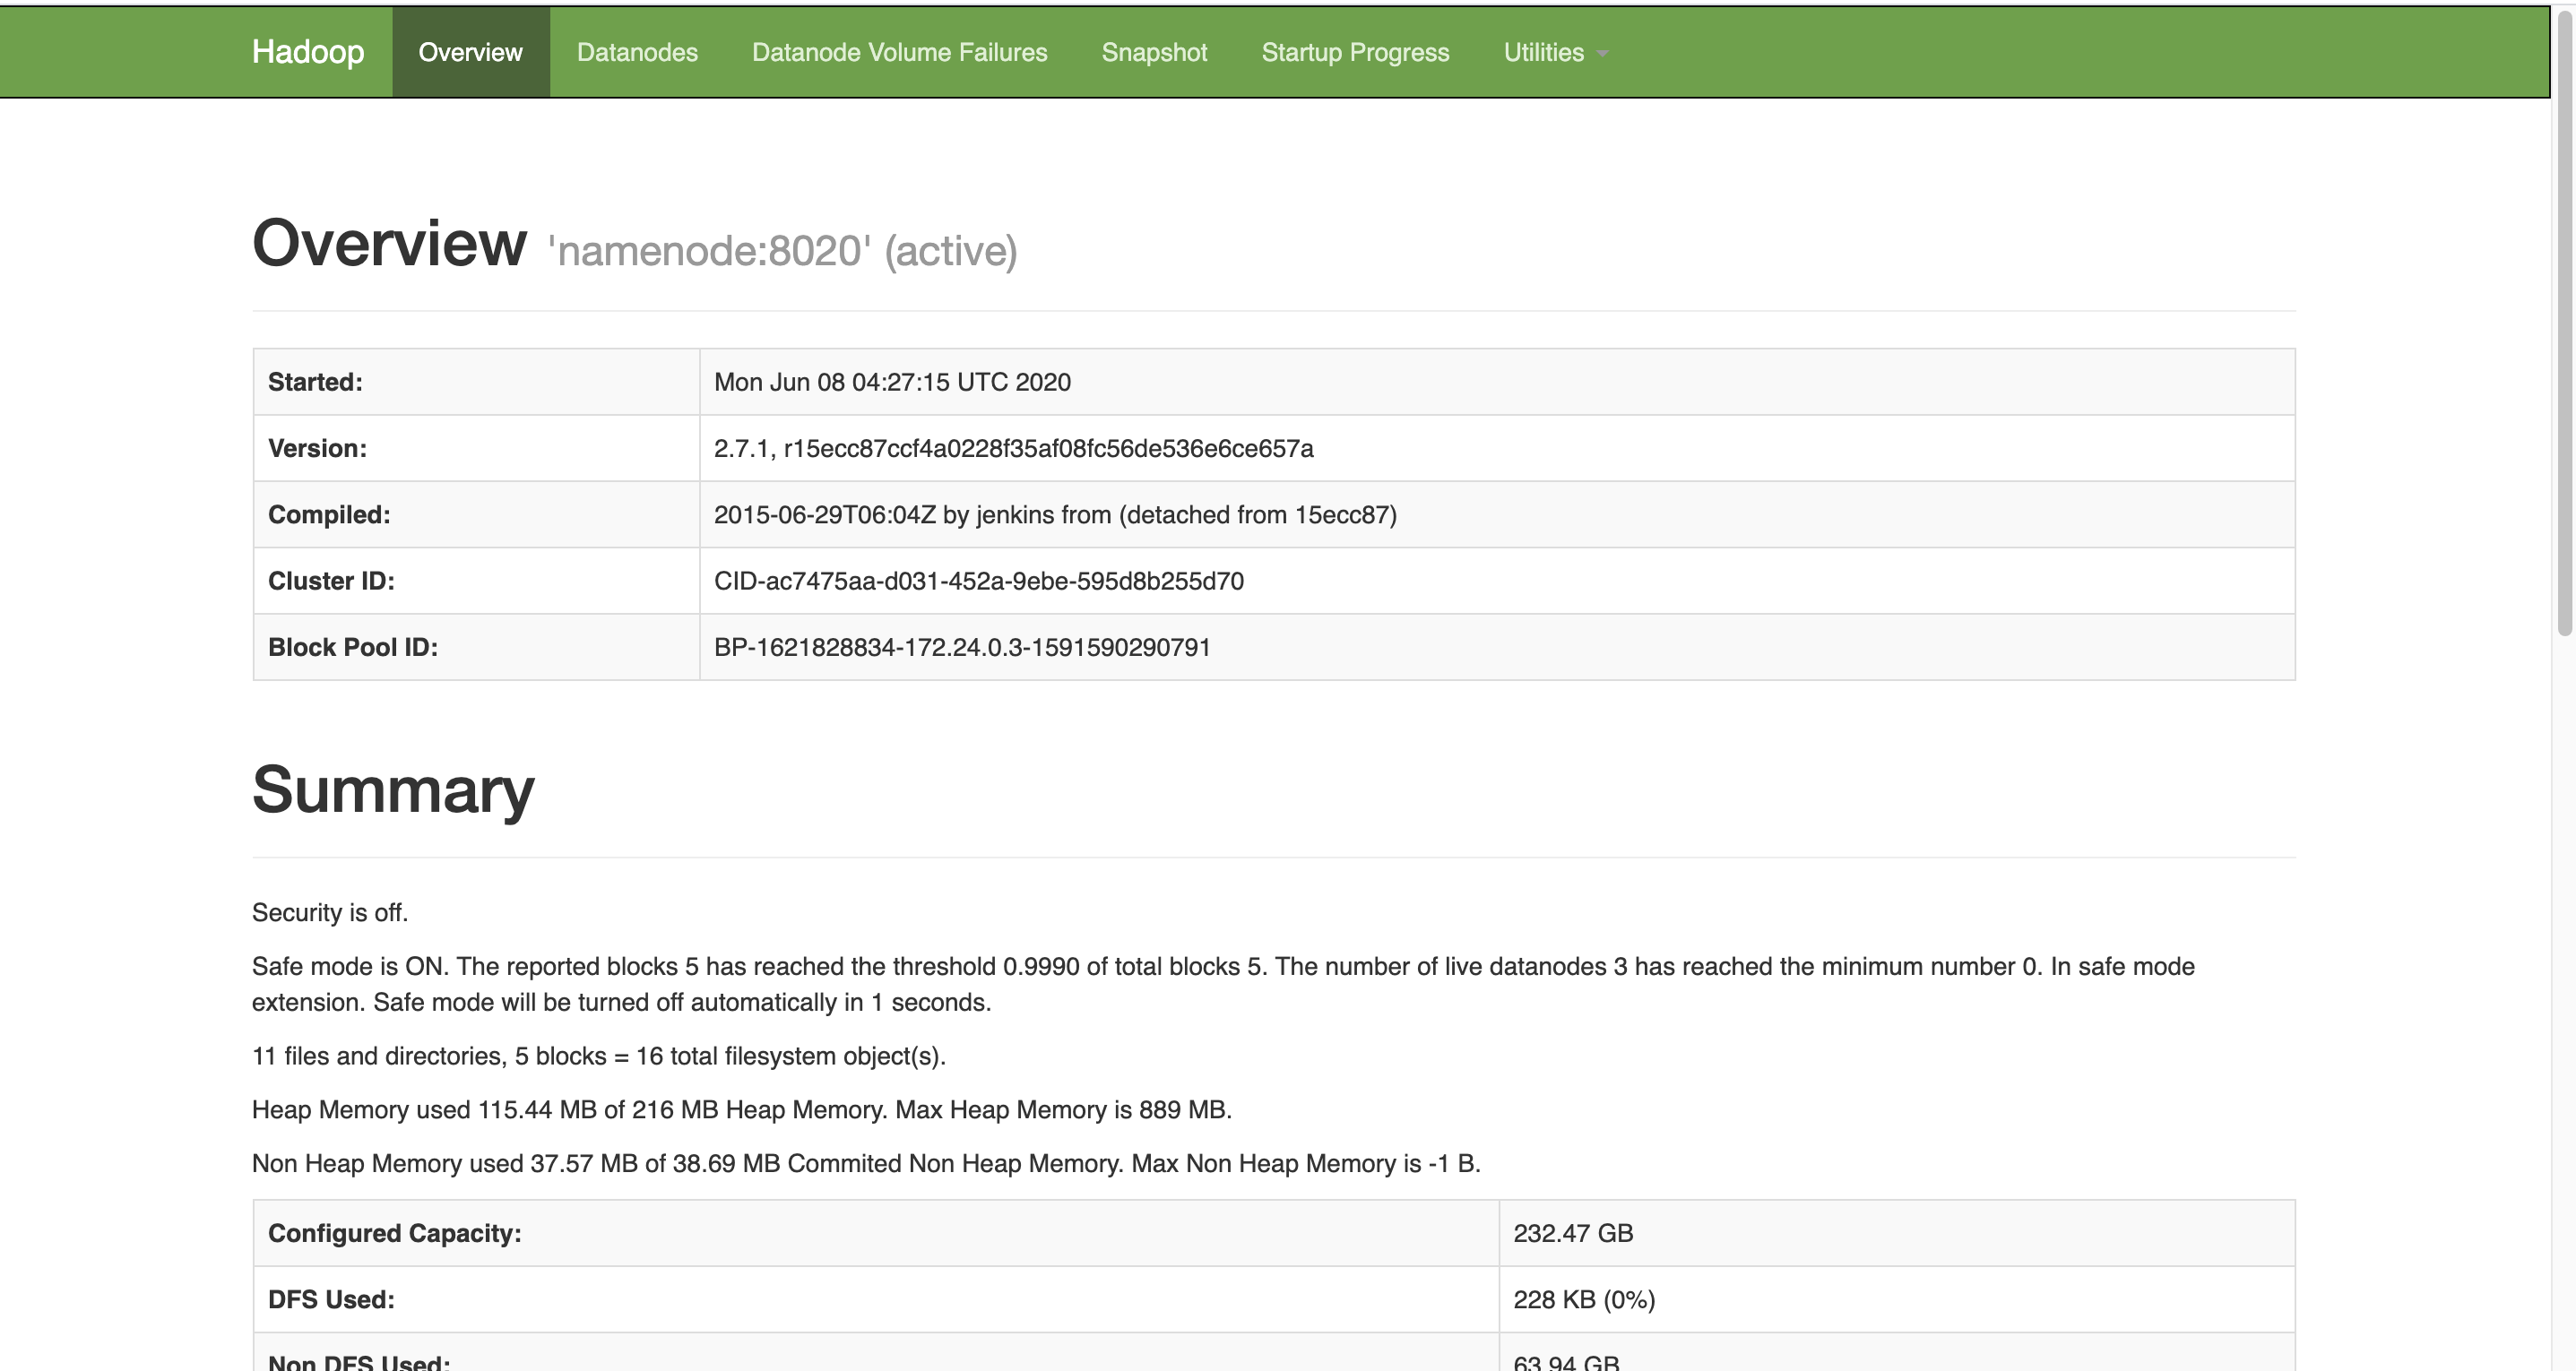
- 用浏览器查看hdfs,如下图,可见有三个DataNode,地址是:http://localhost:50070
- 用浏览器查看spark,如下图,可见只有一个worker,地址是:http://localhost:8080
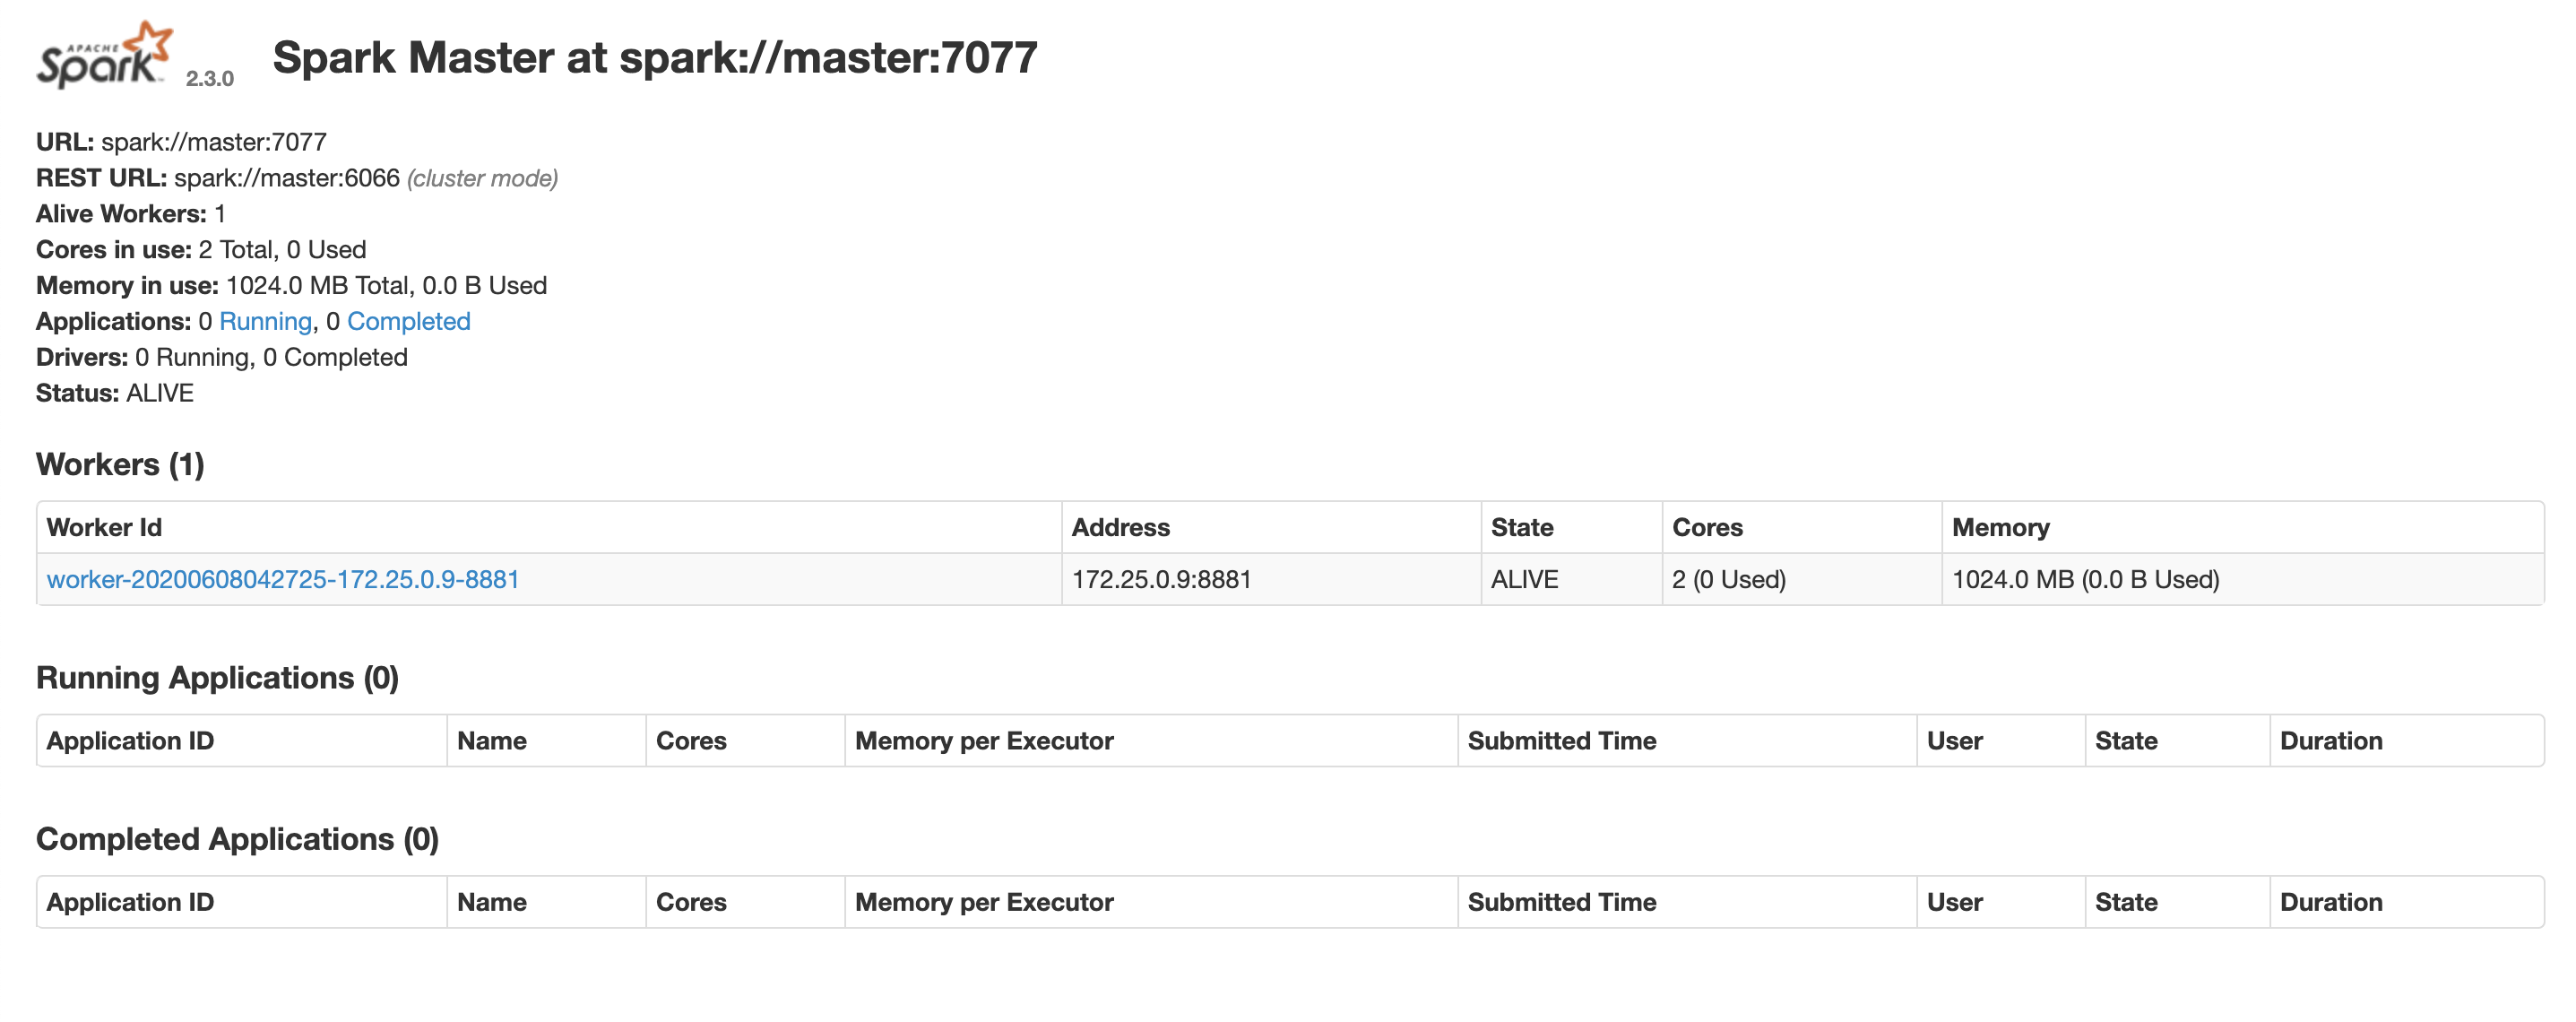
- 注意:spark的worker数量,以及worker内存的分配,都可以通过修改docker-compose.yml文件来调整;
准备实战数据
登录服务器,在刚才执行命令的目录下,发现多了几个文件夹,如下所示,注意input_files和jars这两个,稍后会用到。
稍后的实战是经典的WordCount,也就是将指定文本中的单词出现次数统计出来,因此要先准备一个文本文件,我这里在网上找了个英文版的《乱世佳人》,文件名为GoneWiththeWind.txt,读者您请自行准备一个英文的txt文件,放入input_files文件夹中;
执行以下命令,即可在hdfs上创建/input文件夹,再将GoneWiththeWind.txt上传到此文件夹中:
1
2docker exec namenode hdfs dfs -mkdir /input \
&& docker exec namenode hdfs dfs -put /input_files/GoneWiththeWind.txt /input用浏览器查看hdfs,可见txt文件已经上传到hdfs上.
spark_shell实战WordCount
在电脑的命令行输入以下命令,即可创建一个spark_shell:
1
docker exec -it master spark-shell --executor-memory 512M --total-executor-cores 2
进入了spark_shell的对话模式.
继续输入以下命令,也就是scala版的WordCount:
1
sc.textFile("hdfs://namenode:8020/input/GoneWiththeWind.txt").flatMap(line => line.split(" ")).map(word => (word, 1)).reduceByKey(_ + _).sortBy(_._2,false).take(10).foreach(println)
稍后控制台就会输出整个txt中出现次数最多的十个单词,以及对应的出现次数,如下:
1
2
3
4
5
6
7
8
9
10
11
12
13scala> sc.textFile("hdfs://namenode:8020/input/GoneWiththeWind.txt").flatMap(line => line.split(" ")).map(word => (word, 1)).reduceByKey(_ + _).sortBy(_._2,false).take(10).foreach(println)
(the,18264)
(and,14150)
(to,10020)
(of,8615)
(a,7571)
(her,7086)
(she,6217)
(was,5912)
(in,5751)
(had,4502)
scala>
用浏览器查看spark,可见任务正在执行中(因为shell还没有退出),地址是:http://localhost:8080
输入Ctrl+c,退出shell,释放资源;至此,spark_shell的实战就完成了